What is Office 365 Data Loss Prevention? A Definition of Office 365 DLP, Benefits, and More
What is Data Loss Prevention?
Every business has their own set of confidential and sensitive information they want to keep secure, and the release of this information could do some serious damage to the organization. What can you do to prevent this?
With data loss prevention tools, an end user cannot send sensitive information to an email address outside of your company domain, or to a public cloud storage service such as Dropbox or Google Drive. Any malicious or accidental attempt to send sensitive information out of your network will be blocked and logged.
Data loss prevention uses rules and policies to determine which files and data are considered confidential, critical, or sensitive and then to protect those files from being shared or transmitted. When these rules, policies, and protective measures are applied to Office 365, the aim is to prevent data loss from the Office 365 environment.
It is not just the threat of a rogue employee or a negligent insider that is driving companies to adopt data loss prevention, but also stricter state and global regulations that call for rigorous data and access protection.
What Are the Benefits of Data Loss Prevention?
Breaches are happening at an increasing rate. Data from Ponemon Institute showed that more than 75% of companies had some form of company data loss in 2016, compared to 67% two years before (2014). Surprisingly, negligent employees cause about half of these incidents.
Utilizing a data loss prevention solution could have helped prevent the unauthorized sharing of company information, whether malicious insiders or outsiders were involved. DLP solutions also help in meeting compliance regulations. When companies begin to use cloud services like Office 365, it is important to have a strong DLP solution in place.
How Does Office 365 Data Loss Prevention Work?
Early in 2017, Microsoft came up with the Security and Compliance Center for its Office 365 product, which enabled users to manage several features including data loss prevention.
The Office 365 data loss prevention feature works similarly to other DLP tools in that it will follow a set of business rules. You can now define policies within Office 365 that will govern content and data, and even get notified when someone has violated the business rules you’ve set.
The DLP feature in Office 365 will automatically classify your data and use the policies you set to stop an e-mail from being sent, or to block unauthorized access to classified content.
How to Set Up Office 365 Data Loss Prevention
Setting up data loss prevention in Office 365 is relatively simple, thanks to the application’s built-in features and functionality.
1. Create and store data loss prevention policies. You need to come up with a policy that identifies sensitive data but also allows users to work with it. You should also specify different actions that might occur depending on how the data is being handled. To set up a data loss prevention policy, log into Office 365, choose Admin centers and click on Security & Compliance.
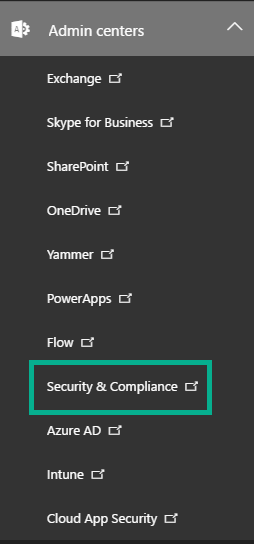
Screenshot via SherWeb Blog
In the Security & Compliance menu, choose Data loss prevention and then click on Policy. Upon clicking the “Create a policy” button, you will be presented with several wizards on how to go through the process of creating different policies, including specific policies for financial, medical, privacy, and customized situations. For instance, you can easily set up policies for financial data through one of the wizards. You can choose the specific standard or even a specific country that is relevant to your business.
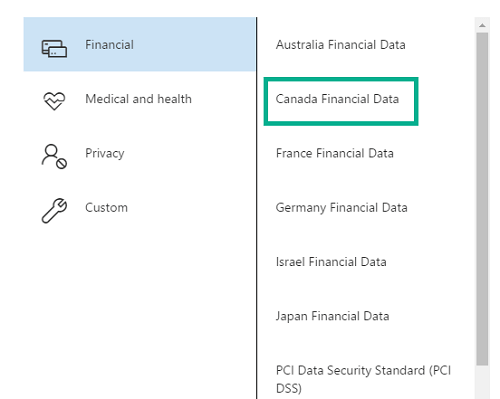
Screenshot via SherWeb Blog
2. Once you have created the policy, click Next and then specify where you want that policy to be enforced. You can choose to apply them in Exchange, SharePoint sites, and/or OneDrive accounts. You can even indicate specific OneDrive accounts and SharePoint sites.
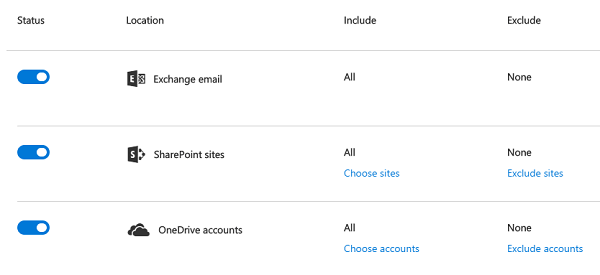
Screenshot via SherWeb Blog
3. You can customize your own set of rules as well. There are two settings options for each policy in Office 365. “Simple settings” allows you to apply the default rules for your chosen policy. You also have “Advanced settings,” which opens the rule editors. It allows you to fine tune what actions and conditions the policy should have.
Screenshot via SherWeb Blog
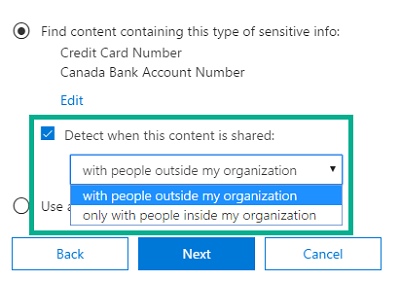
4. After that, you can tweak the policy tips that are shown to users, as well as the number of times a particular piece of sensitive information can be shared before being alerted. Furthermore, you can choose whether you want to block people from being able to share access to sensitive content, or simply restrict access to it.
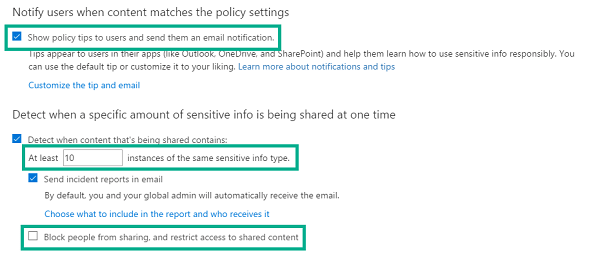
Screenshot via SherWeb Blog
5. Lastly, you can use the newly created policy right away, or keep it turned off. You also have the option to test out the policy before you turn it on.
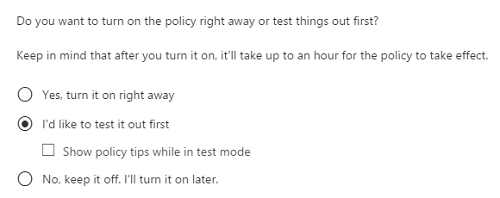
Screenshot via SherWeb Blog
Office 365's DLP can be a nice first step for organizations but it definitely has its limitations compared to enterprise class DLP. Some licenses include basic DLP detection capabilities but lack customizable policies, device type access, and document fingerprinting. Others can monitor and secure data but lack blocking and encryption capabilities.